 Berke İpekçi
Fed up with OneUI 2.5 on your Galaxy S9, S9+, or Note9? Looking to revisit the classic Samsung Experience interface for a bit of nostalgia or curiosity? Here’s a straightforward guide to help you downgrade and bring back that familiar look and feel. Let’s walk through the steps together.
NOTE!: Performing these actions on your device will void your warranty and increase the KNOX counter. SammyPolice assumes no responsibility for any issues that may arise from proceeding.
Requirements:
- Galaxy S9/S9+/Note9 (Exynos 9810 chip device not Snapdragon device)
- TWRP Recovery
- PC
- Odin3 and Samsung Drivers for PC
- Samsung Experience LightROM
First we need to unlock the OEM unlock of our device.
NOTE: This process will erase ALL data on your device.
- 1- Open settings app
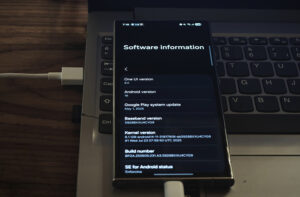
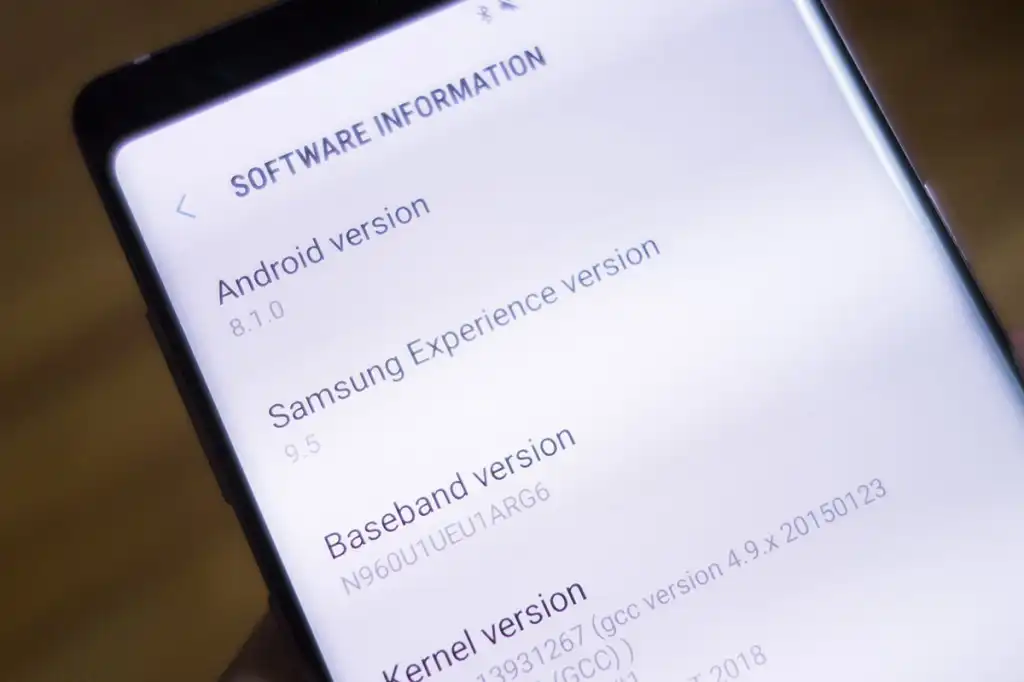
- 2 Find about phone section and tap software information
- 3-Double click build number (Enable developer mode)
- 4-Once developer mode is enabled, tap OEM Unlock.

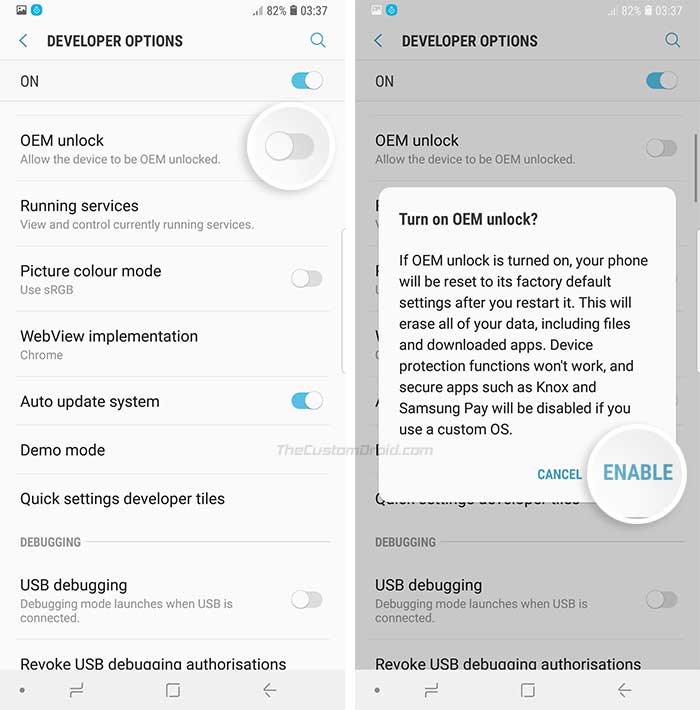
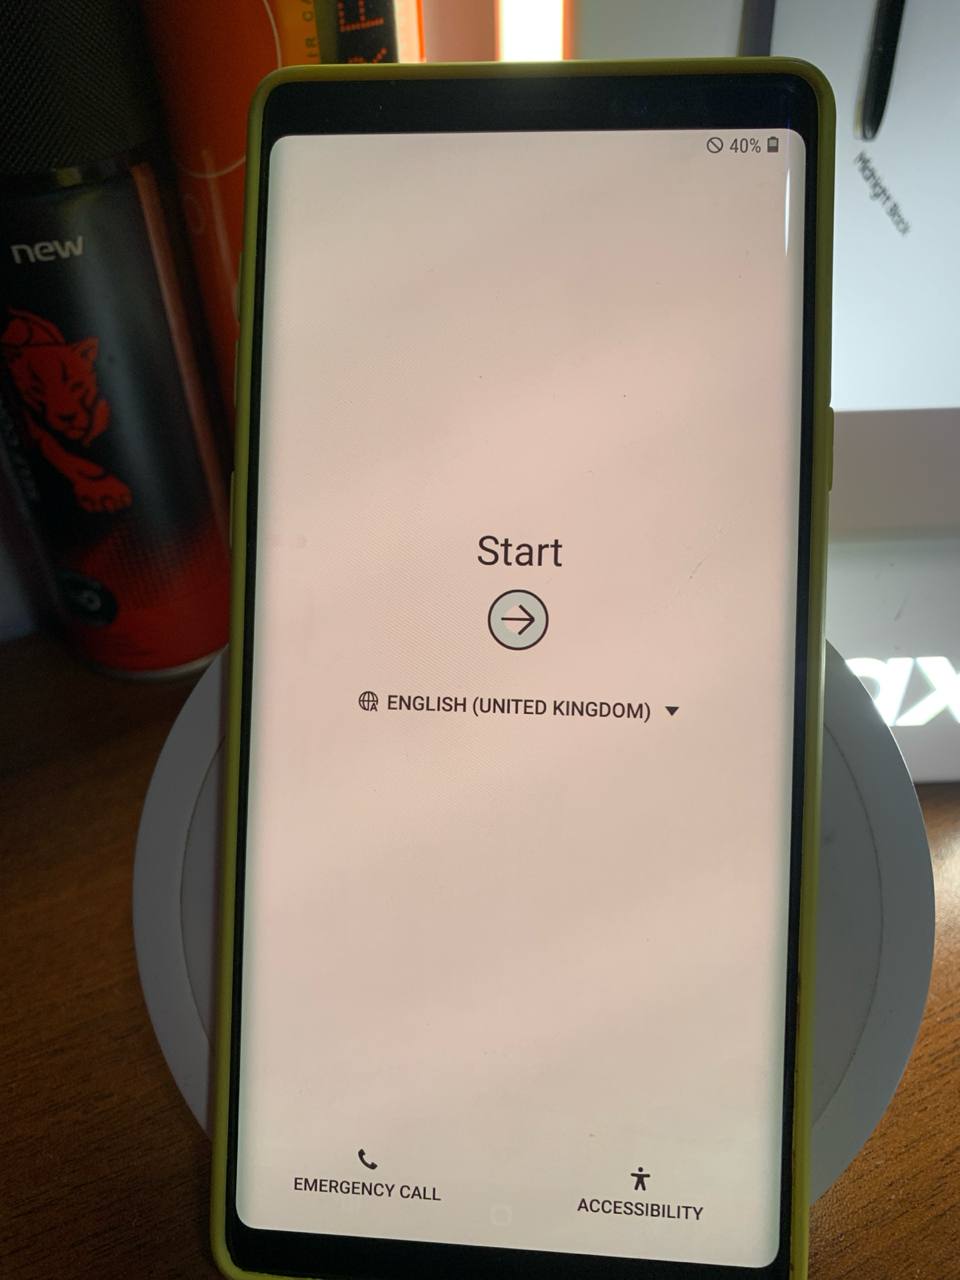
Once you confirm, your device will RESET and restart. After it powers back on, proceed with the setup process to reach the home screen.
After you reach the home screen, download the TWRP recovery for your Galaxy to your computer.
Once TWRP has been downloaded, the next step is installation on your Galaxy device. To facilitate this process, you’ll need to download Odin3 as well.
And we also need to install Samsung device drivers for Odin3 to see our Galaxy device.
After all the processes are completed, we download the LightROM for our device. This is a Samsung Experience based custom rom.
If the ROM files have been downloaded, let’s move on to flashing TWRP to the phone.
Instructions
- Shut down your phone
- Plug PC your phone
- Press and hold the power, volume down, and bixby button at the same time.
- When the exclamation mark appears, press the volume up key.
- Open Odin3 on your PC
- Tap BL Button and Select TWRP Recovery
- Tap start on Odin3
- When the boot logo appears on your device, quickly press and hold the power, volume up and bixby buttons for 5 seconds.
If your device powers on as it normally would, it means you didn’t access recovery mode quickly enough. In this case, you’ll need to repeat the TWRP flashing procedure and ensure you enter recovery at the right moment.
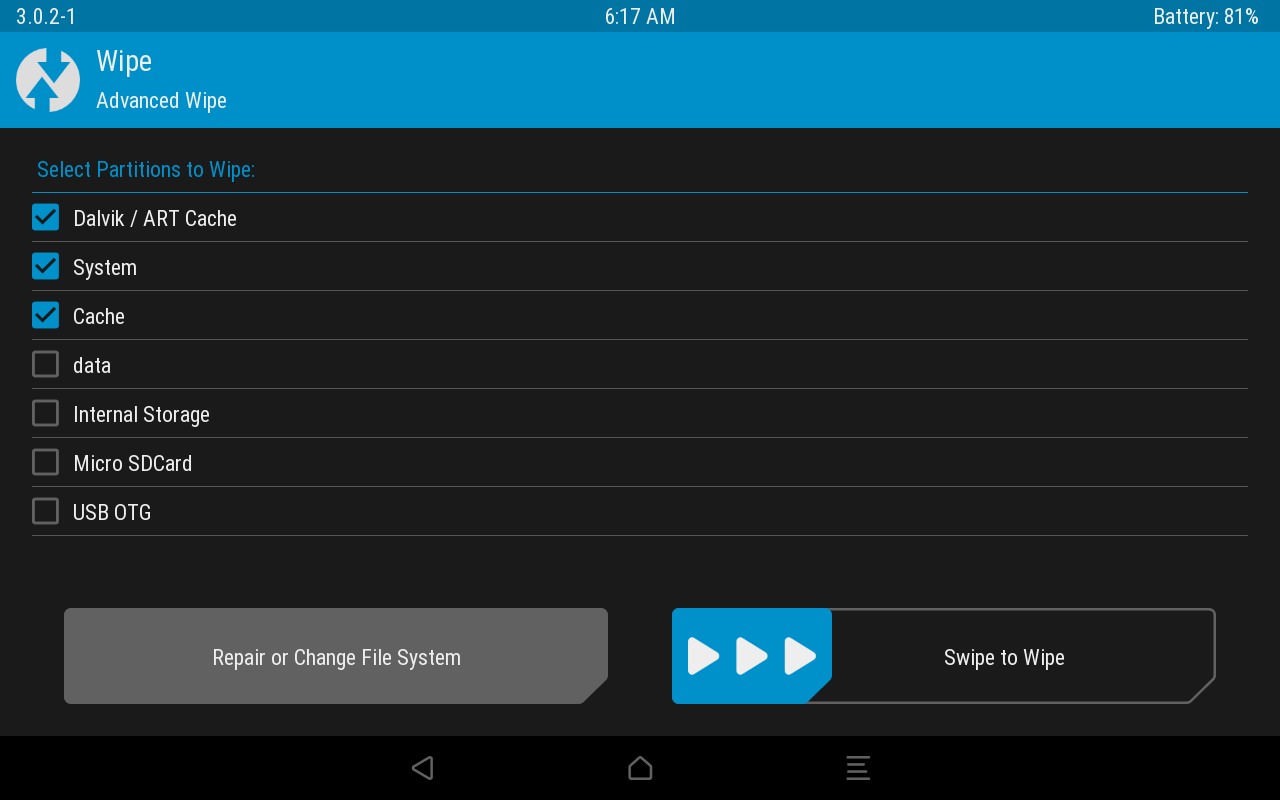
- After TWRP booted click on “Wipe“
- Click on “Format Data“
- Type “yes” and confirm format action.
- Once format data is done click on the “Back” button.
And Send the LightROM you downloaded from your computer to your phone. (The computer will see your device.)
After you have transferred the rom file to your device, come back from the wipe section and go to the Install section and select the ZIP file and swipe to install it.
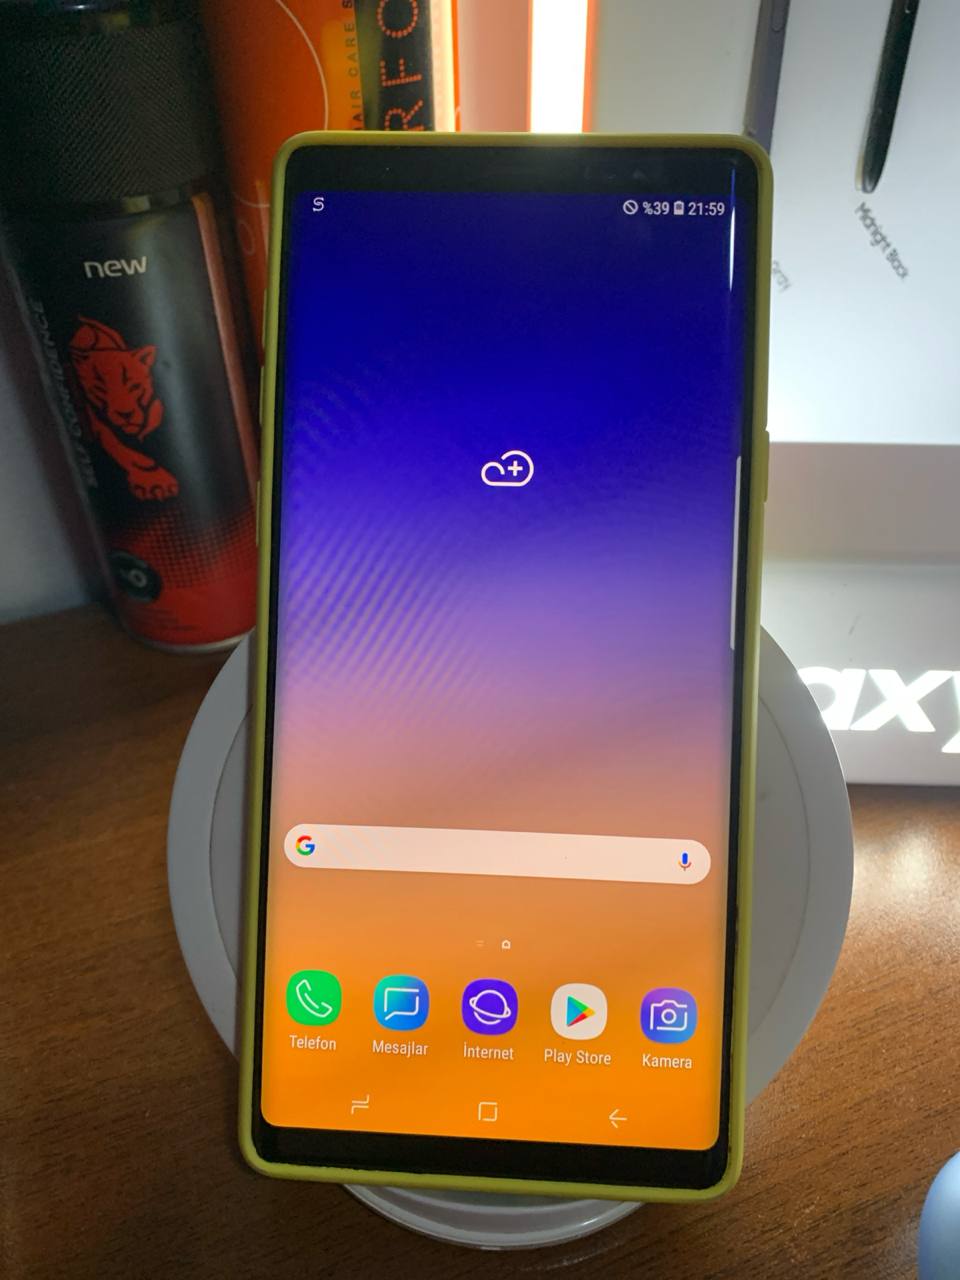
And that’s it. Now restart your device and start enjoying the Samsung Experience interface.